Bulk actions
Bulk actions allow a user to invoke a single mutation against multiple resources.
This can be particularly useful for tasks such as deleting large numbers of items in one go, like the example of deleting 300 topics in a single request.
Bulk actions are invoked using a strategy. At the moment, the only strategy implemented is fire-and-continue.
The fire-and-continue strategy will invoke each mutation sequentially. If one of the individual mutations fails, Kpow will ignore the failure and continue invoking the remaining mutations until all mutations have been invoked.
Configuration
Bulk actions work with the BULK_ACTION Role Based Access Control. By default bulk actions are disabled.
Note: a user will need both the BULK_ACTION permission and also the correct permission(s) to execute each of the intended mutations (for example, TOPIC_DELETE).
This allows users to compose bulk actions on top of existing RBAC permissions. For example, you might want to allow users to individually delete topics, but not grant them permission to bulk delete topics.
Environment variables (simple access control)
If you are using Simple Access Control (environment variables) to define access controls for Kpow, you can enable bulk actions with the following environment variable:
ALLOW_BULK_ACITON=true
Role-Based Access Control
The following examples will configure bulk actions when using Role Based Access Control yaml.
Enable bulk actions for all roles:
The following example is analogous to the ALLOW_BULK_ACTION environment variable:
policies:
  - actions: ["BULK_ACTION"]
    effect: Allow
    resource: ["*"]
    role: "*"
Only enable connect bulk actions for the role kafka-admins:
Bulk actions are granular. You might want to only enable bulk actions for a specific subset of resources (eg, connect resources):
policies:
  - actions: ["BULK_ACTION"]
    effect: Allow
    resource: ["connect", "*"]
    role: "kafka-admins"
Usage
Bulk actions can be invoked from any table that supports them. To access bulk actions, navigate to the table and click the bulk action icon (a bar icon next to the table filter). This will display a menu with all available bulk actions for that table.
For example, you can access the bulk action menu for the connectors by navigating to the Connect UI and viewing the connectors table.

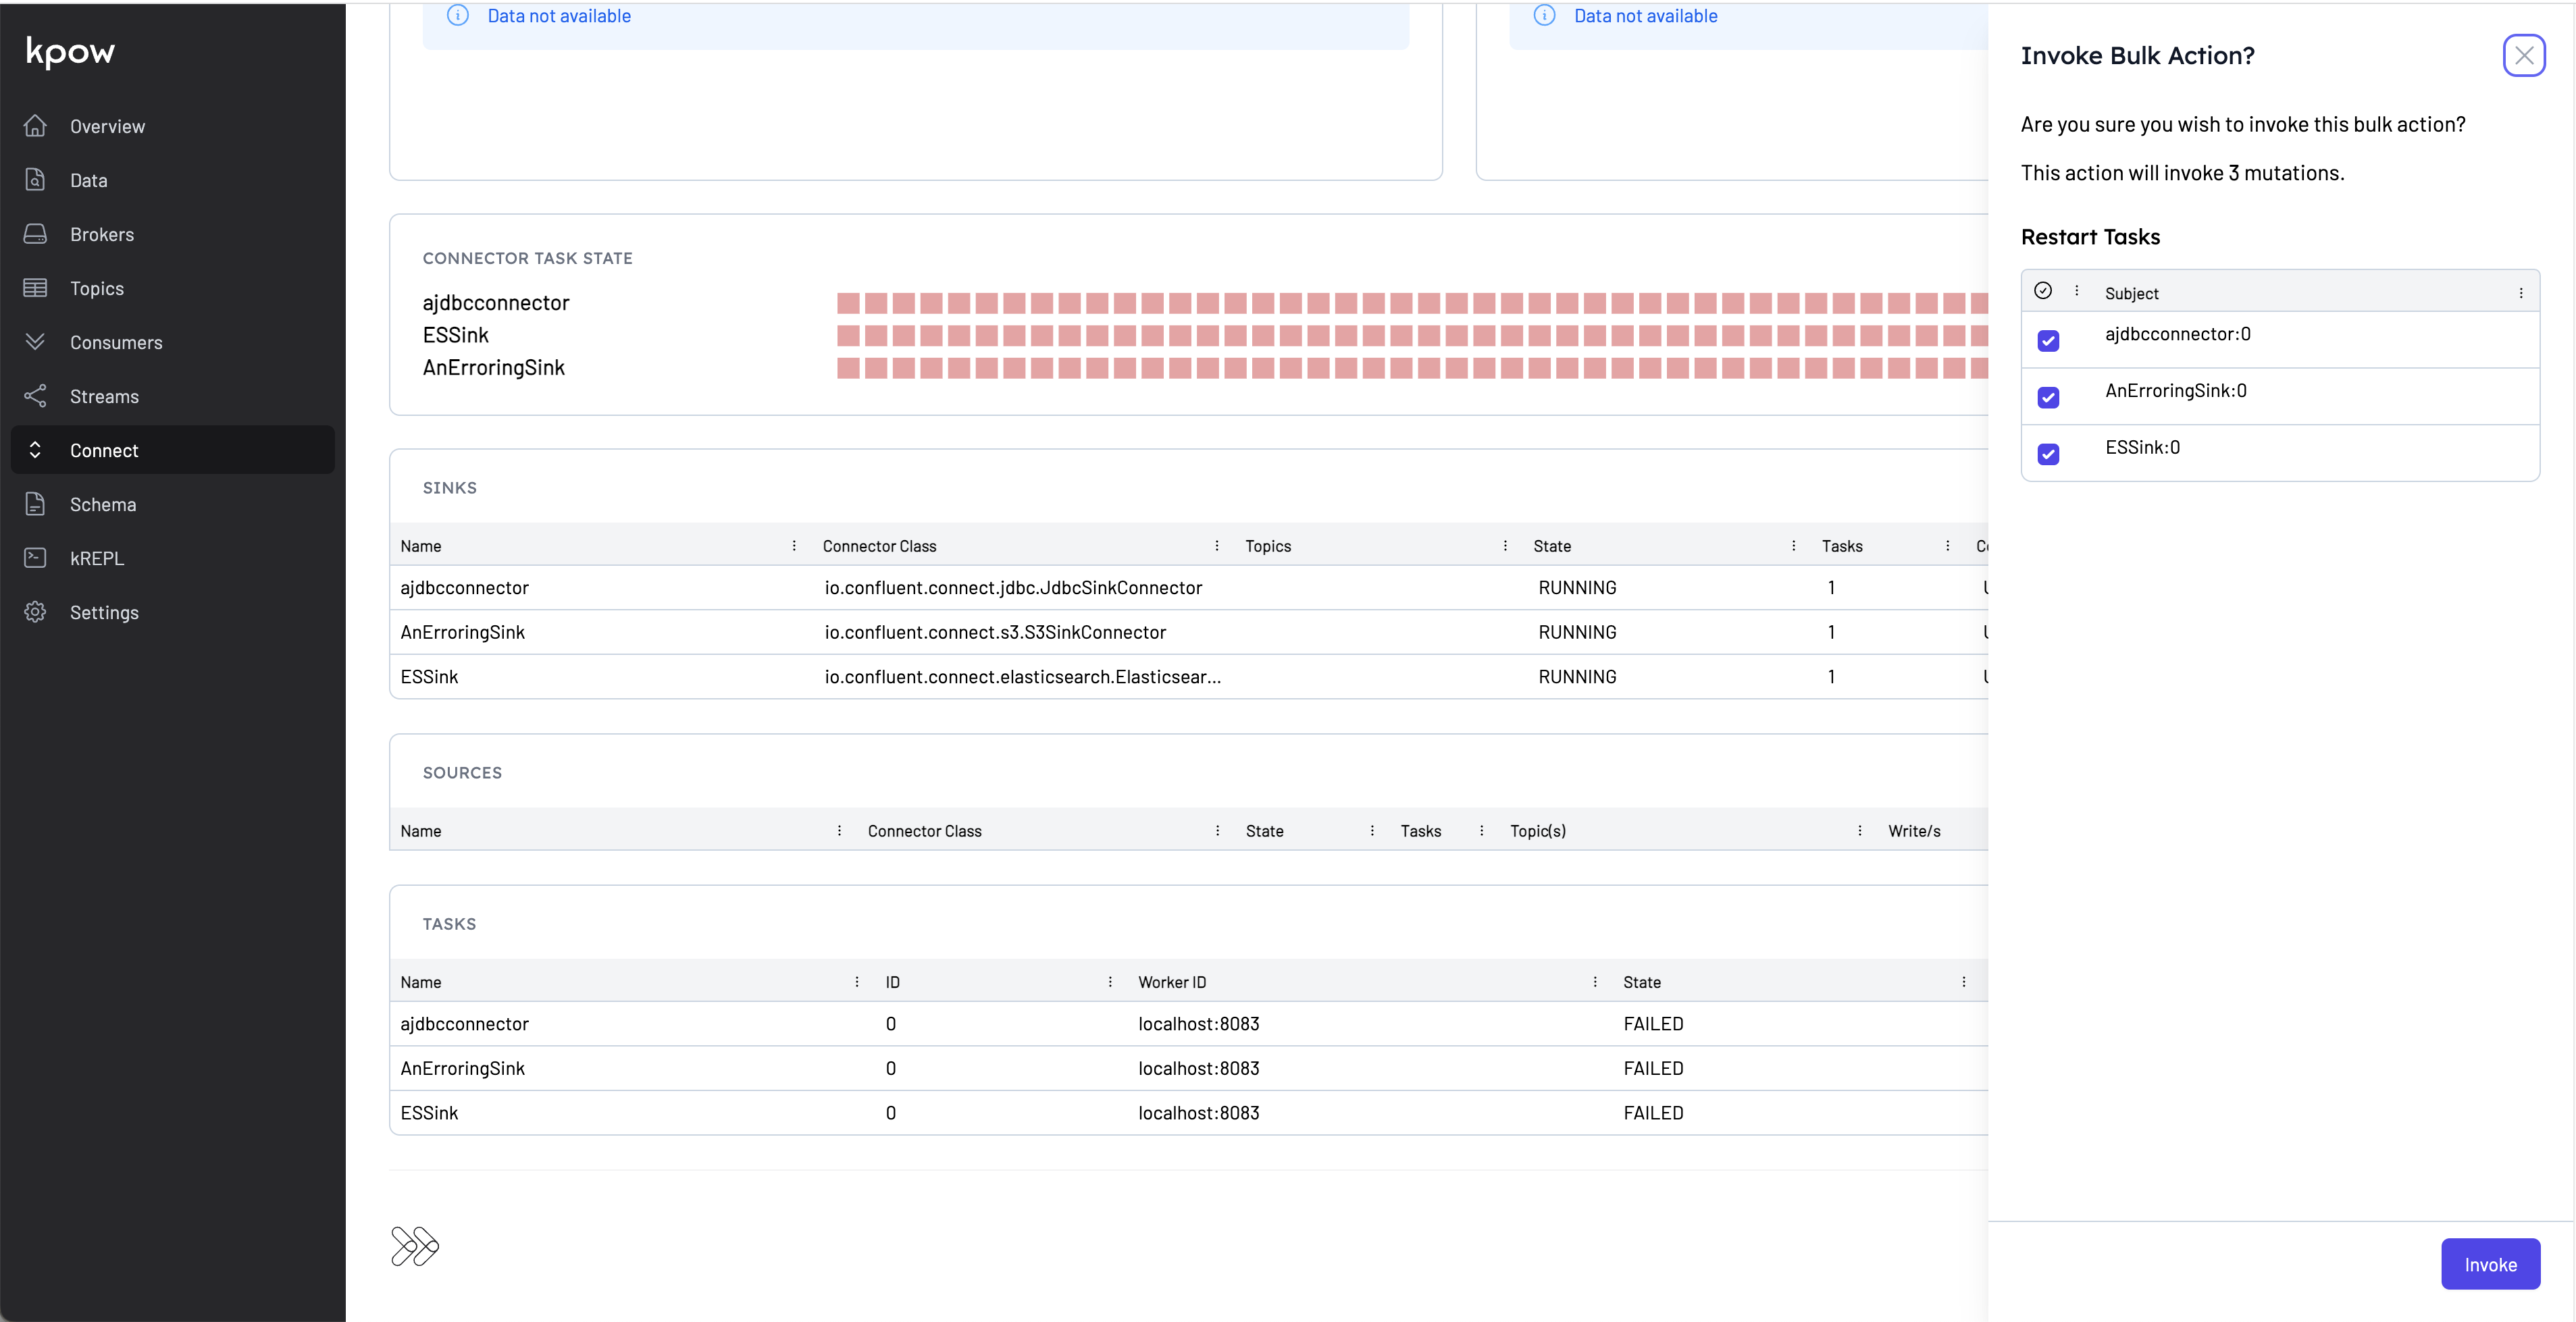
Additionally, you can use the table's fast filter or top-level filters to limit which resources will be affected by the bulk action. For example, you can narrow the scope of the bulk action to only include connector tasks that have failed by filtering for tasks with a state of 'FAILED'."

When you select a bulk action, a slide-out panel will appear to confirm the details of the bulk action request. From this panel, you can further filter the items by deselecting the checkbox on one of the rows in the table.

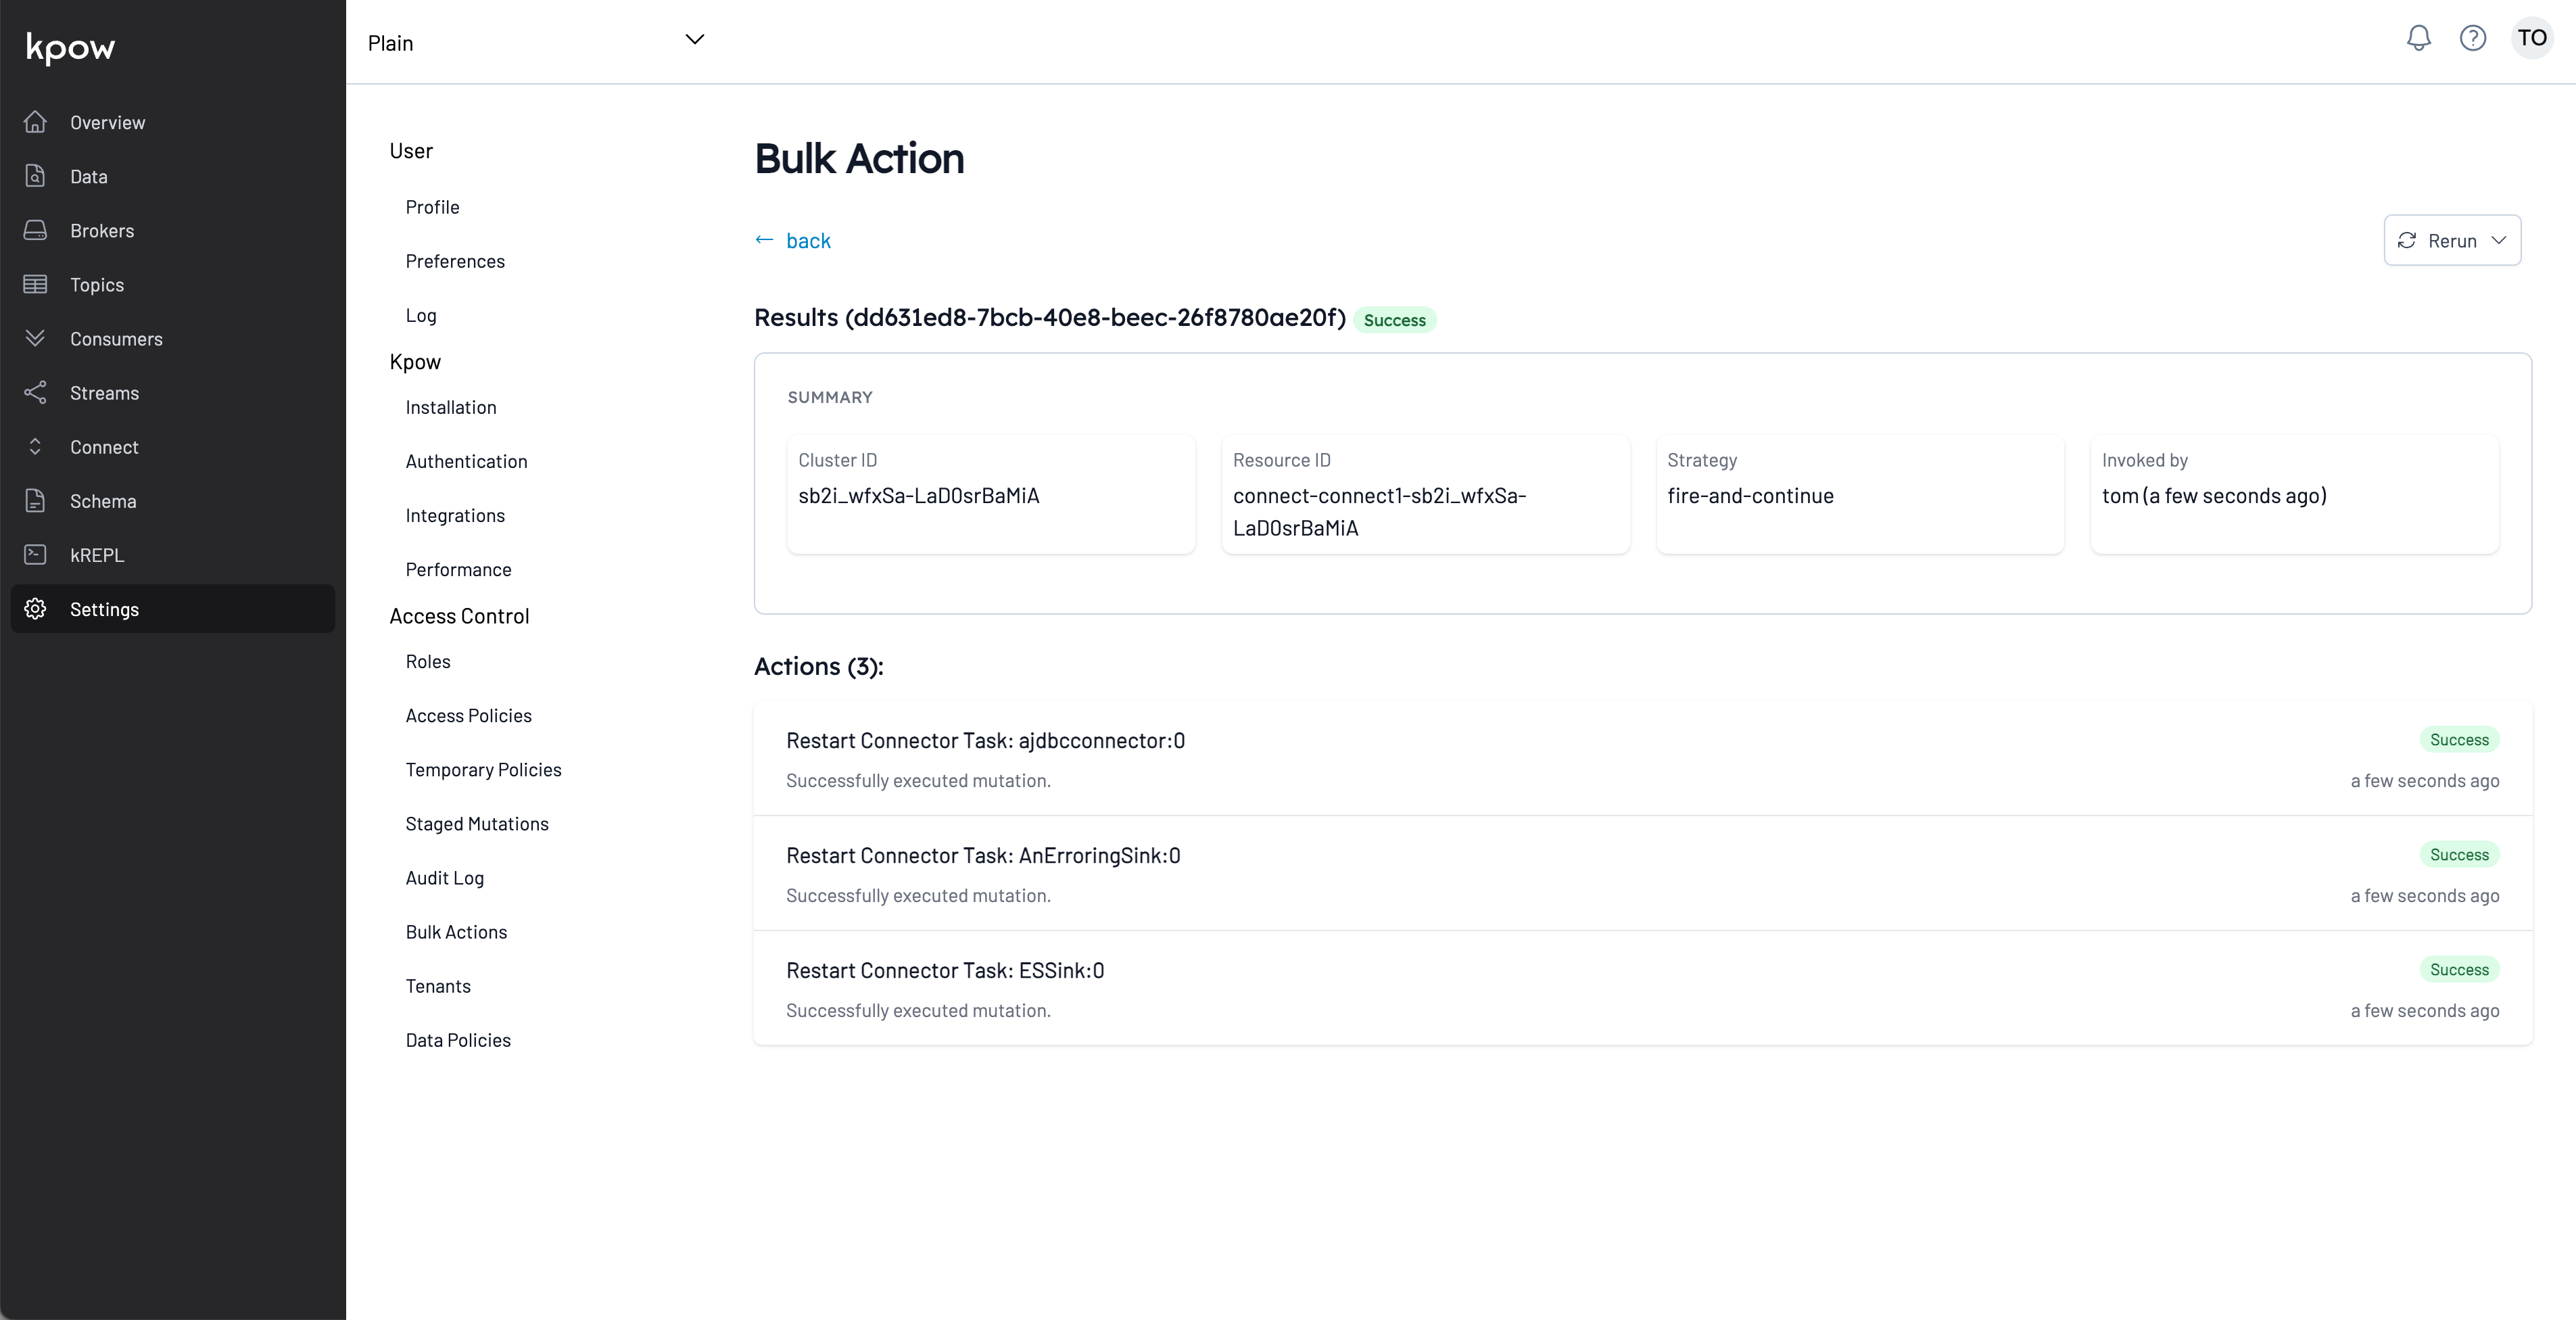
To track the progress of a bulk action, navigate to the 'Bulk actions' page under 'Settings'. This page will display the status, details, and results of the bulk action, as well as allow you to re-run the bulk action from within the page.
Furthermore, if some mutations within the bulk action fail, you can choose to re-run only those failing mutations.

Like all other mutations, bulk actions get captured to the Data Governance (Audit Log) for Data governance.