TeamEnterprise
Azure AD
User authentication
Configuring Azure AD
- Open the Azure Portal and select the directory to use for single sign-on.
- Navigate to Enterprise Applications > Add an Application > Non-Gallery Application.
- Pick a name for the Flex instance that you are securing and click the Add button.
- You should now be in the dashboard for the Flex application.
- Navigate to Single Sign-On, select SAML as the single sign-on method.
Basic SAML configuration
- Identifier (Entity ID): set this to a suitable name for the instance you are securing, e.g. Flex-UAT-1.
- Reply URL (Assertion Consumer Service URL): Your Flex instance SAML URL, e.g:
https://flex.corp.com/saml - Leave the other fields blank
SAML signing certificate
Download the Federation Metadata XML file and (optionally) Certificate (Raw). Save these for later.
Integrate Flex and Azure AD SSO
Set the following environment variables and start Flex.
AUTH_PROVIDER_TYPE=saml
SAML_RELYING_PARTY_IDENTIFIER=[Identifier (Entity ID)]
SAML_ACS_URL=[Reply URL (Assertion Consumer Service URL)]
SAML_METADATA_FILE=[path to downloaded Federation Metadata XML]

# Optional
SAML_CERT=[path to the Certificate (Raw) .pem file]
Flex will now authenticate users with Azure AD.
User authorization
See the guide to Role Based Access Control for full configuration details.
Integrate Azure AD and Flex RBAC
- Follow this Microsoft guide to populate
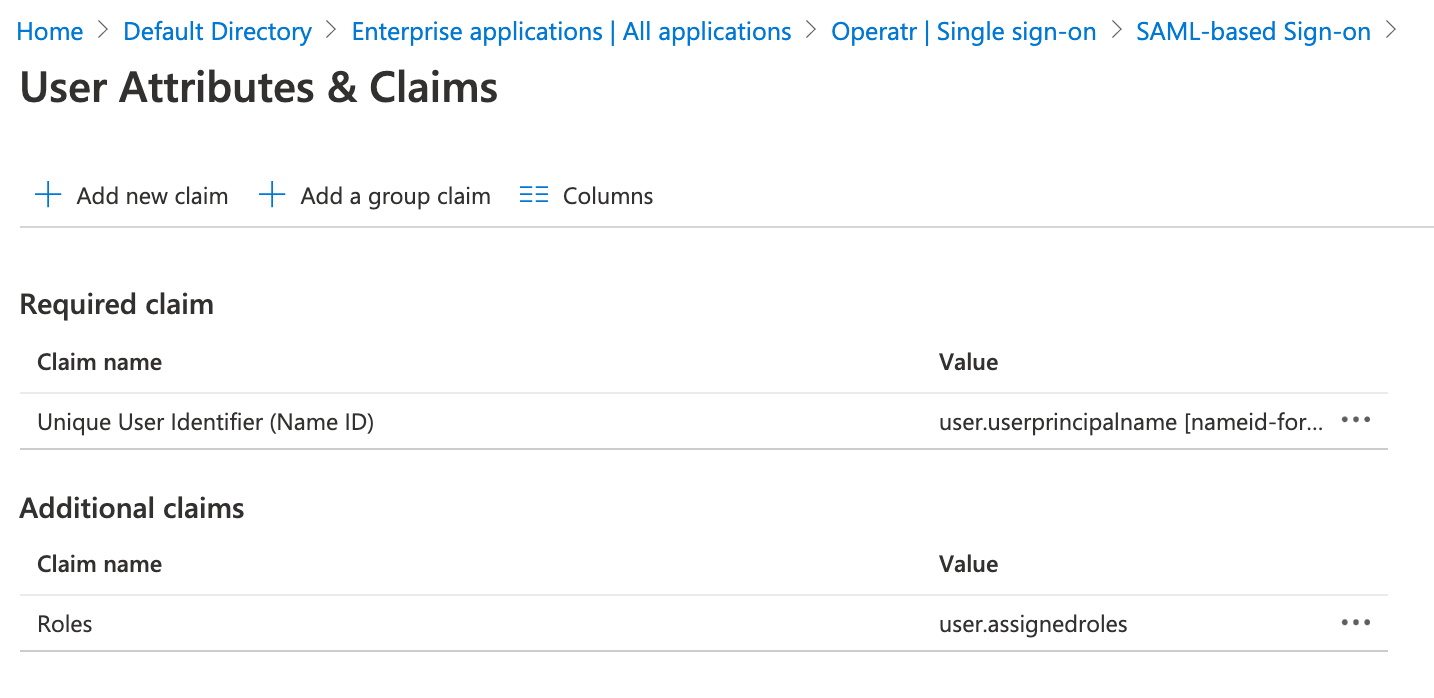
user.assignedroles - Then setup attribute claims within your Enterprise Application configuration like so:
- Required Claim: Set
Unique User Identifier (Name ID)touser.userprincipalname - Additional Claim: Set
Rolestouser.assignedroles
- Required Claim: Set
- Note: Azure AD does not pass the default role (
User) as an assigned role in the SAMLResponse.