TeamEnterprise
Keycloak
Create a Keycloak application
- Log in to your Keycloak account as an Administrator.
- Go to Clients in the left menu, and click Create.
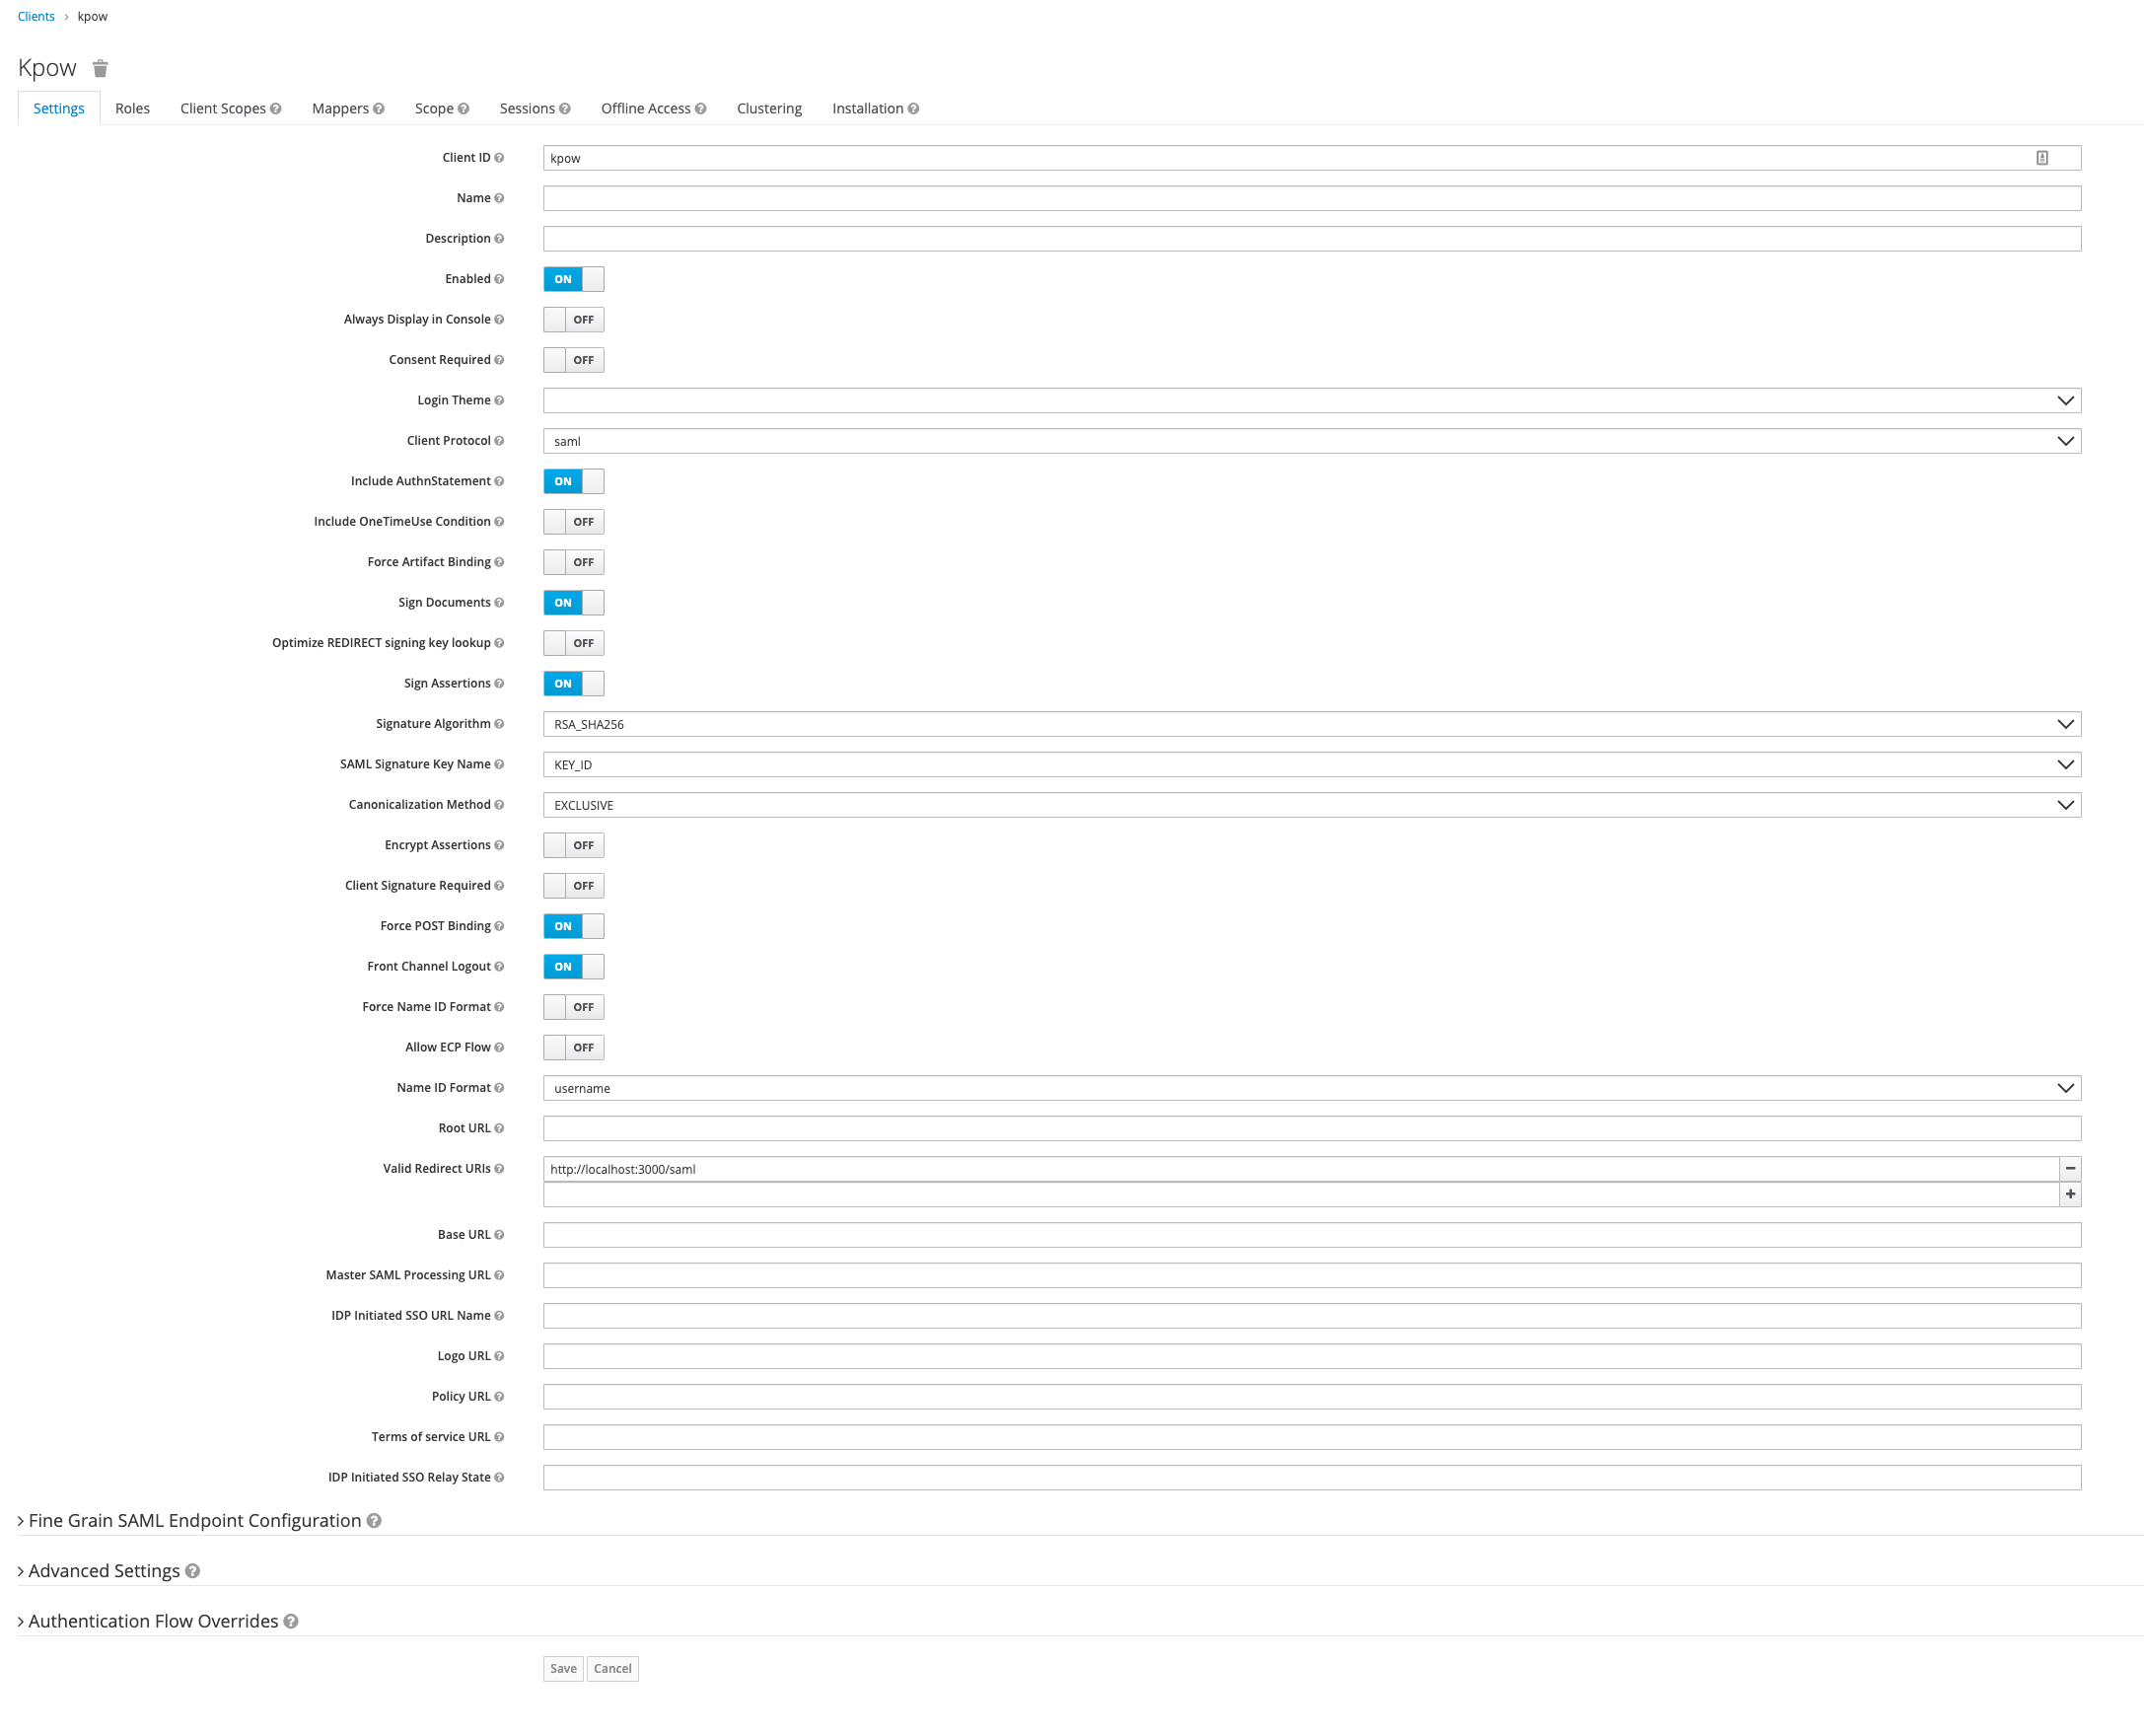
- Input the following details to the Add Client form:
- Client ID: set this to a suitable name for the instance you are securing, e.g. Kpow-UAT-1.
- Client Protocol: select saml.
- Click Save.

- While editing the application configure the following:
- Set Sign Assertions to ON.
- Set Client Signature Required to OFF.
- For Valid Redirect URIs, enter: "https://kpow.mycorp.io/saml" (where kpow.mycorp.io is the URL of where Kpow is hosted)

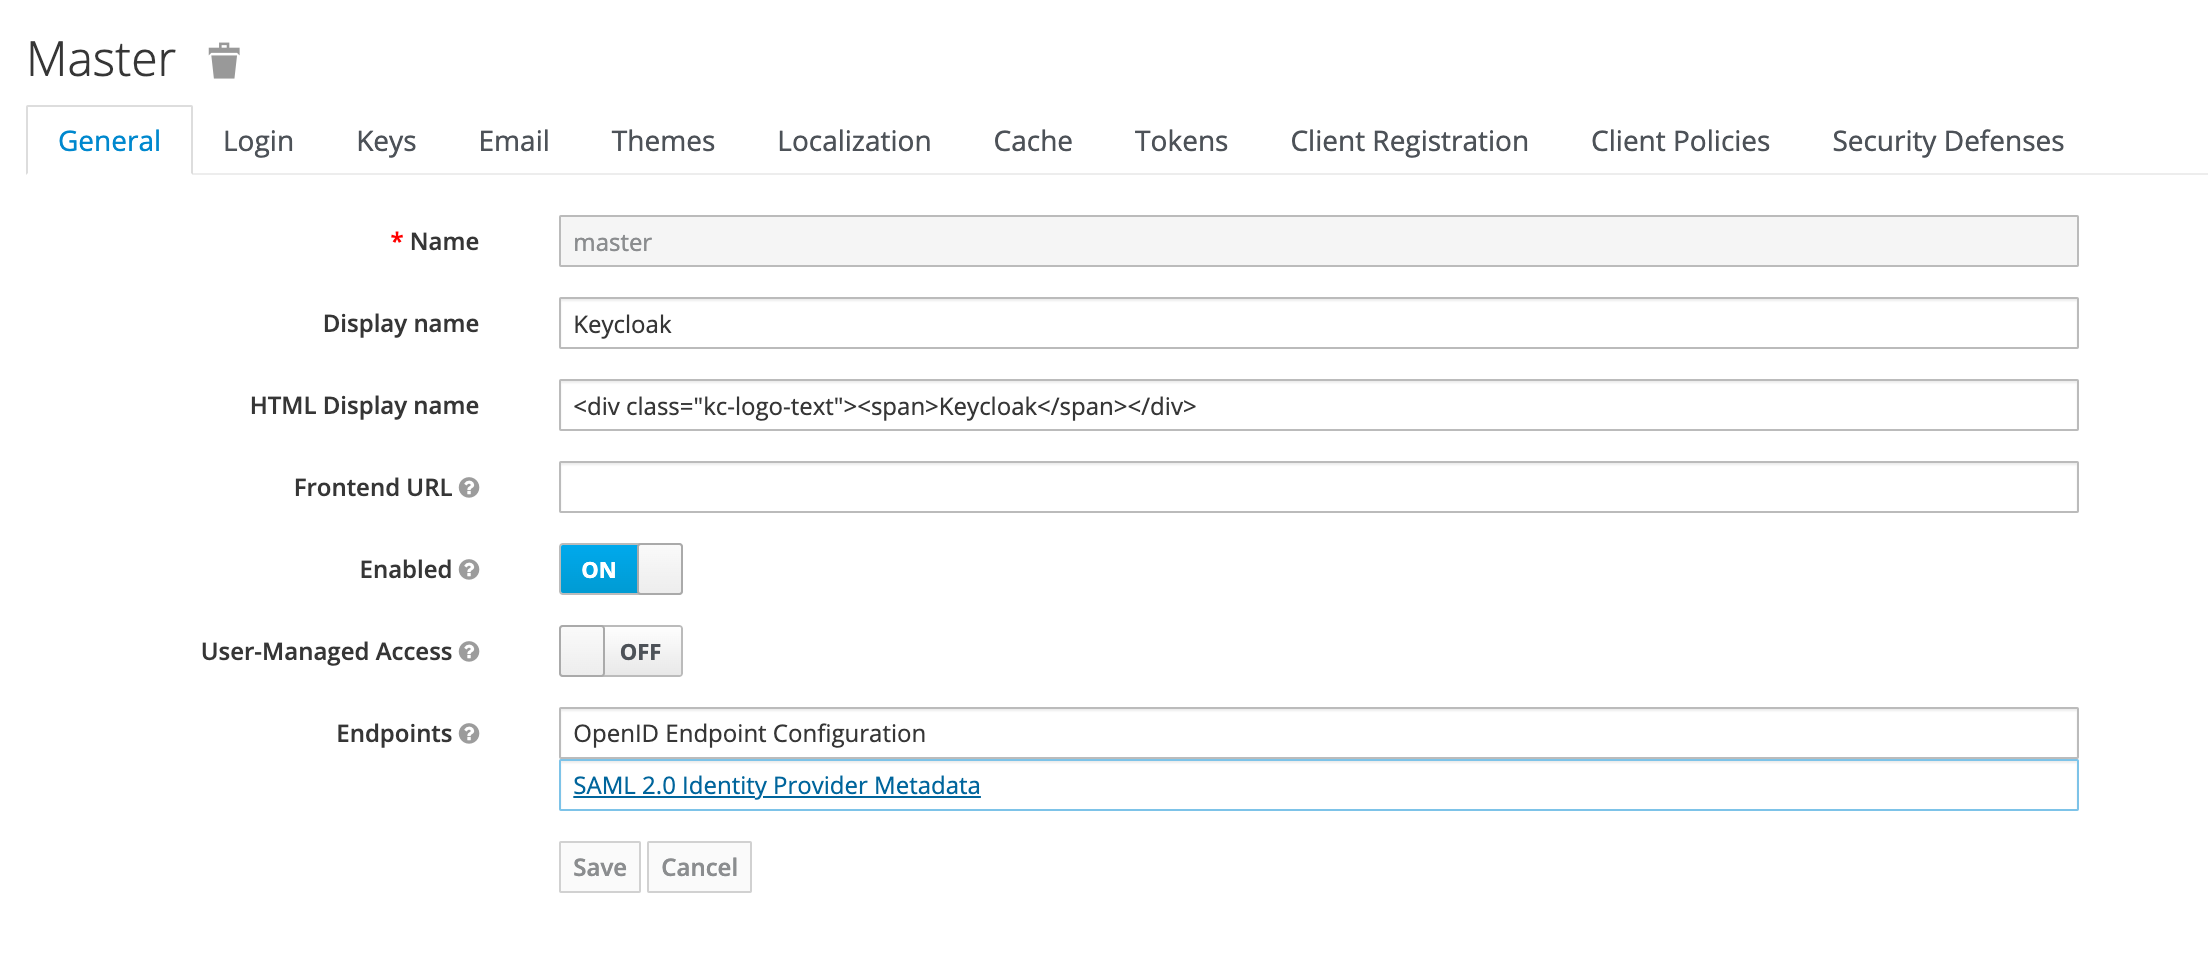
- Go to "Realm Settings" in the main left menu and click SAML 2.0 Identity Provider Metadata. Download the XML file and keep for the next step.

Configure Kpow
Set the following environment variables and start Kpow:
SAML_RELYING_PARTY_IDENTIFIER=the Client ID set in step 1AUTH_PROVIDER_TYPE=samlSAML_ACS_URL=the Valid Redirect URI from before, e.g.https://kpow.corp.com/samlSAML_METADATA_FILE=the path to the SAML 2.0 Identity Provider Metadata file from step 6, e.g./var/saml/saml-idp-metadata.xml
Kpow will now authenticate users with Keycloak (SAML).
User authorization
- Navigate to Kpow's SAML client in Keycloak and go to the Mappers tab and click Add Builtin
- Select the built in mappers for role list and click Add Selected

- Within your Role Based Access Control add the following line:
saml:
  role_field: "Role"