Instaclustr Platform
What is Instaclustr Platform?
The Instaclustr Platform is a unified, managed service for deploying, operating, and monitoring open-source data infrastructure technologies like Apache Kafka, Apache Cassandra, and PostgreSQL in both cloud and on-premises environments. It simplifies the complexities of these powerful open-source tools by providing a single interface for management, with 24/7 expert support, allowing companies to focus on application development rather than infrastructure maintenance.
Network reachability (firewall rules)
By default, Instaclustr secures all clusters by blocking external traffic.
To allow Kpow to connect to your Instaclustr environment, you must manually add the IP address of the machine hosting Kpow to the firewall rules within the Instaclustr console.
If you are using the Schema Registry or Kafka Connect, you must update the Firewall Rules for those specific services as well.
Cluster authentication
All necessary connection details, including your Bootstrap server IPs, username, and password, can be found on the Connection Info page of your Kafka cluster within the Instaclustr console.
Instaclustr secures broker connections using SASL/SCRAM authentication. Configure Kpow with the following properties:
ENVIRONMENT_NAME=Instaclustr Demo
BOOTSTRAP=<KAFKA-IP1>:9092,<KAFKA-IP2>:9092,<KAFKA-IP3>:9092
SECURITY_PROTOCOL=SASL_PLAINTEXT
SASL_MECHANISM=SCRAM-SHA-256
SASL_JAAS_CONFIG=org.apache.kafka.common.security.scram.ScramLoginModule required username="<KAFKA_USERNAME>" password="<KAFKA_PASSWORD>";
Note: Depending on your specific Instaclustr deployment, your SECURITY_PROTOCOL may be SASL_SSL. Always verify this on your Connection Info page.
Ecosystem Integration
If you have provisioned the Karapace Schema Registry as an enterprise add-on, or are running a managed Kafka Connect cluster in your Instaclustr environment, Kpow can manage them natively.
Karapace Schema Registry
To manage your schemas directly within Kpow, add the following properties. Be sure to use the URL secured with a CA-signed certificate (found on the Schema Registry Connection Info page).
SCHEMA_REGISTRY_NAME=Instaclustr Karapace
SCHEMA_REGISTRY_URL=https://<REGISTRY_URL_WITH_CA_CERTIFICATE>:8085
SCHEMA_REGISTRY_AUTH=USER_INFO
SCHEMA_REGISTRY_USER=<SCHEMA_REGISTRY_USERNAME>
SCHEMA_REGISTRY_PASSWORD=<SCHEMA_REGISTRY_PASSWORD>
Managed Kafka Connect
To monitor connectors, tasks, and configurations, add your Connect cluster details. Instaclustr often requires permissive SSL for its Connect REST endpoints.
CONNECT_NAME=Instaclustr Connect
CONNECT_REST_URL=https://<KAFKA-CONNECT-IP>:8083
CONNECT_PERMISSIVE_SSL=true
CONNECT_AUTH=BASIC
CONNECT_BASIC_AUTH_USER=<KAFKA_CONNECT_USERNAME>
CONNECT_BASIC_AUTH_PASS=<KAFKA_CONNECT_PASSWORD>
Quickstart
You can launch a Kpow instance pre-configured for your Instaclustr environment using Docker.
Provide your configuration via an environment file (e.g., setup.env containing the properties outlined above) and ensure your Kpow license file is available.
docker run -d -p 3000:3000 --name kpow \
  --env-file=./setup.env \
  --env LICENSE_ID="<LICENSE_ID>" \
  --env LICENSE_CODE="<LICENSE_CODE>" \
  --env LICENSEE="<LICENSEE>" \
  --env LICENSE_EXPIRY="<LICENSE_EXPIRY>" \
  --env LICENSE_SIGNATURE="<LICENSE_SIGNATURE>" \
  factorhouse/kpow:latest
For brevity, Kpow authorization configuration has been omitted. See Simple Access Control to enable necessary user actions.
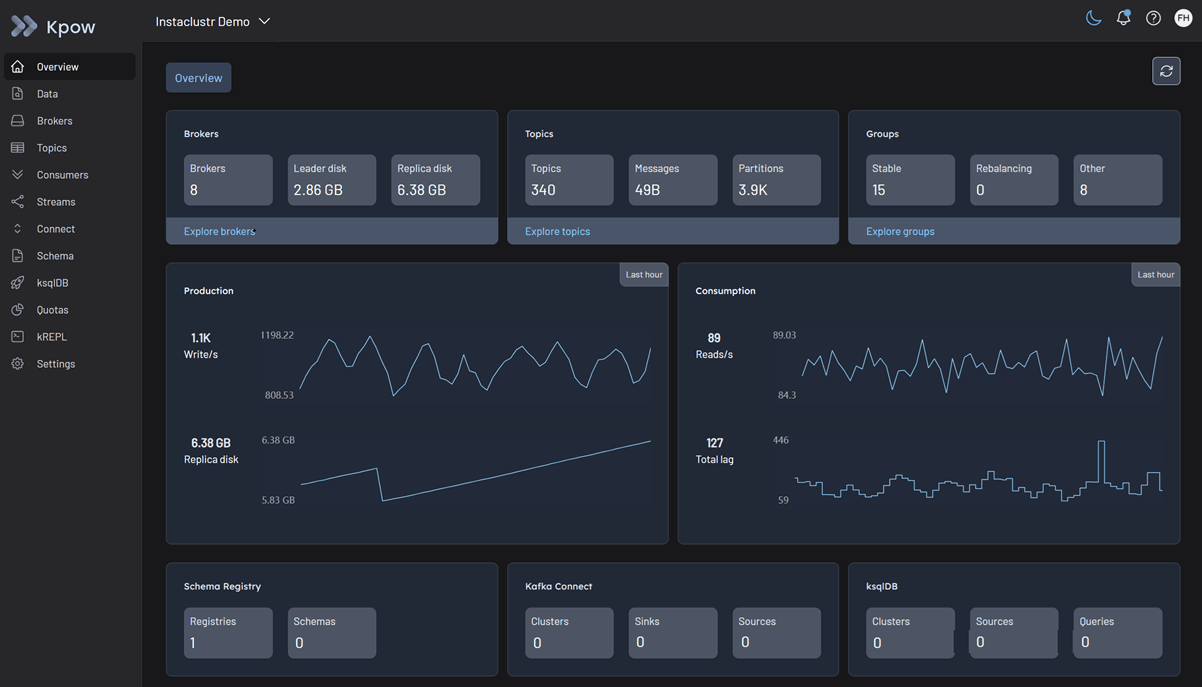
Once the container is running, Kpow will be accessible at http://localhost:3000. The user interface will confirm the successful discovery of your Kafka brokers, Schema Registry, and Kafka Connect cluster.